State Fair

State Fair
State Fair Ribbons

Saturday, October 8, 2016

Easy Squash Soup

I planted 6 squash plants this year.  3 acorn and 3 butternut. I forgot how large their leaves get and how much space they take up.  I even had a sqaush vine and squash hanging high up in my Cotoneaster hedge.  It was my most perfect shaped squash.  
I like easy.  I came up with this recipe by using Alton Brown's basic recipe. With my changes this is the best squash soup I've ever tasted.  I don't usually mess with Alton, but this time his soup was laking something for me.  
You judge for yourselves!!  You can make it savory or sweet.  Just omit the sugar.  
I used spenda to replace the sugar so my diabetic mom could try it.  You can't tell it has a sugar sub.  
My changes to Alton's recipe were to use half and half instead of cream, (milk plus cream) less salt, no nutmeg, powdered ginger instead of fresh, a whole small onion, a tiny bit of ground cloves, and cinnamon.  You could make this dairy free by using coconut milk.  
I used acorn squash for this first batch.  Their flesh is a bit less orange than the butternut. 


Squash soup in Starbuck's Pumpkin mug

Recipe: 
Alton Brown's original recipe for  squash soup with my changes in CAPS below.         

Ingredients

3 to 3 1/2 pounds butternut squash, approximately 2, seeded and quartered (I used 2 large acorn squash)
1 SMALL ONION CUT UP
OIL Unsalted butter, melted, for brushing
SALT FOR SPRINKLING 1 tablespoon kosher salt, plus 1 teaspoon
1 teaspoon freshly ground white pepper, plus 1/2 teaspoon
3 cups chicken or vegetable broth
1/4 cup honey OR ¼ CUP SPLENDA
1 teaspoon minced fresh ginger OR ¼ TEASPOON POWDERED
1 TEASPOON GROUND CINNAMON
1/8 TEASPOON GROUND CLOVES-tread lightly this is strong. 
1/2 cup heavy cream  HALF AND HALF OR WHOLE MILK
1/4 teaspoon freshly grated nutmeg


Directions

Heat the oven to 400 degrees F.
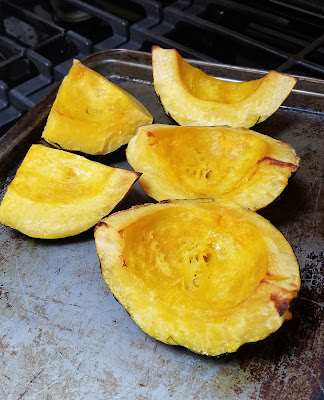
Place the quartered squash onto a cookie sheet with rims, brush the flesh of the squash with OIL AND SPRINKLE GENEROUSLY WITH SALT. a little butter and season with 1 tablespoon of the salt and 1 teaspoon of the white pepper. Place in the oven and roast for 30 to 35 minutes or until the flesh is soft and tender-poke with a fork to see if it is soft.  WHILE SQUASH ROASTS COOK THE ONION IN A SMALL PAN WITH A LITTLE OIL UNTIL IT IS TRANSLUCENT BUT NOT CRISPY.  SET ASIDE.
Scoop OR PEEL with a vegetable peeler the flesh out of the SQUASH skin and place into a 6-quart pot. Add the  COOKED ONION, broth, honey and ginger. Place over medium heat and bring to a simmer, approximately 7 to 8 minutes. Using a stick blender, puree the mixture until smooth*. Stir in the HALF AND HALF heavy cream and return to a low simmer. Season with the remaining CINNAMON, CLOVES, 1 teaspoon salt, pepper, and nutmeg.
*When blending hot liquids: Remove liquid from the heat and allow to cool for at least 5 minutes. Transfer liquid to a blender or food processor and fill it no more than halfway. If using a blender, release one corner of the lid. This prevents the vacuum effect that creates heat explosions. Place a towel over the top of the machine, pulse a few times then process on high speed until smooth.
Original  recipe courtesy of Alton Brown, 2003.  Changes made by me 2016.


Tuesday, February 16, 2016

KEY LIME PIE-LOOK MOM, NO EGGS!!

Well, almost 2 years has gone by since my last post.  I can't believe that much time has passed.  Dealing with other's health issues and my ebay store distracted me from baking blogging.  I also had not been to my Winter escape in Florida for 2 years.  Well, I was lucky enough to go this year.  I just returned from the Fort Myers area with a key lime pie agenda because after sampling probably half a dozen different key lime pies, I was not impressed with any of them.  


It was disappointing. Some too sweet, some too tart, some too cheese-cakey, some too sour creamy, some soggy crusts, crumbly crusts, etc. One slice was served at a fine restaurant and the key lime filling was grainy!!!  I called the server over to tell her.  She got the owner.  The owner said it is a frozen pie they thaw and they are well known for it-grainy texture and all.  I was shocked and so was my aunt. It felt like eating sand-not that I know what that's like, but I can guess now!!.  Neither one of us could take more than one bite.  

Usually my quest for a good popular pie takes more than one try because there are hundreds of recipes for it.  Not this time!!  I lurk on the Cookie Madness blog often because Anna has great recipes and many of them.  The first recipe I tried and altered just a little bit was perfect for me!!!   Tart, sweet, silky smooth, and with a crispy crust that contrasts deliciously in your mouth with the smooth pie.  Oh, and did I mention NO EGGS??? And did I mention lower cholesterol due to NO EGGS and use of YOGURT instead of sour cream???   I don't know why anyone would use eggs anymore when you can make a fantastic pie with out them.  And only 4 ingredients in the filling!  The original recipe I altered is found here on Cookie Madness    If you try my rendition of this recipe (or Cookie Madness' recipe), I'm confident you will not be disappointed.  What's especially nice is since there are no eggs, once you fully mix mix the filling ingredients together, you can taste it to see if it is tart enough for you before you make the commitment of pouring it into the pie shell.   
Just to whet your appetite

Smooth as silk inside


You will need the following ingredients.  I forgot to include butter and the larger lime in the first photograph.  You can use either graham cracker crumbs or cookie crumbs for the crust. Both options are pictured here.


I use a microplane for zesting the limes.  The lime I zested was a larger persian lime which is the standard lime available in grocery stores. 


My pie plate was too large.  It was a 10 inch.  A 9 inch would yield a little thicker filling, but still not high.  You can fix that by doubling the filling recipe below


Here is the recipe:

Preheat oven to 350

Use a 9 or 10 inch pie plate (10 inch will be thin like mine) 

INGREDIENTS:

Crust:
18 Oreo Toasted Coconut sandwich cookies  (or an Oreo flavor of your choice)
4 Tablespoons SALTED butter - melted. (salted is a must as the cookies are sweeeeet) 
1/8 teaspoon salt or just a pinch

Filling: (May be doubled for a thicker, taller pie)
1 can (14 oz) sweetened condensed milk 
1/4 generous cup of full fat plain unsweetened yogurt
7 Tablespoons fresh squeezed lime juice  (1 large lime yielded 4 Tablespoons of juice for me and then I added 3 Tablespoons from about 6 or 7 key limes I juiced)  Or you can use bottled juices.
1/2 Tablespoon of lime zest or more for zestier pie. (1 large lime yielded about 1 Tablespoon zest.) 

Topping: 
Redi Whip or make your own whipped cream topping 
Left over lime zest for sprinkling on whipped cream

DIRECTIONS:

**Crust
Process the whole cookies in a food processor until they are small crumbs (or put them into a zip lock baggie and smash them by hand or with a rolling pin).  Pour into a medium sized bowl and mix in salt.  Then mix in melted butter.  
Press cookie mixture into the pie plate (I use the bottom of the one cup measuring cup or a small rounded bowl to press the mixture into the pan.)  
Bake for about 6-7 minutes.  

**Filling
While the crust is baking and In a medium bowl add in the sweetened condensed milk, yogurt, zest, and lime juice.  Mix well to make sure yogurt is blended in-make sure you mix from the bottom of the bowl where yogurt hides sometimes!  
Pour into the baked pie crust and bake another 6 or 7 minutes.  You can tell it is done by taking the pie out and gently shaking it-it should not be too jiggly. I also saw some bubbles forming on the top so I knew it was time to take out.  Mine was set at 7 minutes.  DO NOT WAIT UNTIL THE FILLING BROWNS!!!

Cool for about an hour at room temperature or until the pie is no longer warm.  If you don't want condensation drops to form on the plastic covering the pie (they can drip onto the pie and discolor it), after cooling for an hour on the counter put the pie uncovered in the refrigerator for about 30 minutes. Then cover tightly and refrigerate for at least 4 hours.  

If you use a canned whipped topping, don't put it on the whole pie, but just on each piece served.  That type of whipped topping melts after a while so it won't survive in the refrigerator overnight.  I learned that the hard way.  

Please let me know if you try this recipe!!


Notes: 
1.  I used a glass pie plate and my cookie crust did not stick to it. If you use metal or something else you might want to lightly butter or oil the pie plate so the slices come out easily.