State Fair

State Fair
State Fair Ribbons

Friday, October 21, 2022

The Real Lincoln Del Chocolate Cream Ice Box Pie


The real Lincoln Del recipe for their chocolate ice box pie.   Took me years to find it.  The original recipe card had the amounts for 7 pies so I needed to do some scaling down.  

Here it is:

** Recipe for one pie 

4 1/2 ounces of butter or 9 tablespoons 

2.3 Oz unsweetened baking chocolate bar ( I use 2.5 oz)

6.85 Oz granulated sugar or approximately nine-tenths of a cup of sugar

6.1 Oz eggs or three large eggs. I use pasteurized eggs.

One pre-baked pie shell.

 DIRECTIONS:

Beat butter with sugar until creamy. Use paddle attachment if you use a stand mixer. Carefully melt and slightly cool chocolate so it is not hot.  Blend into sugar butter mixture.

Important Next Step:  Use wire whip on your electric stand mixer or regular beaters on your hand-held electric mixer to add one egg at a time, beating on high speed for about 4 or 5 minutes for each egg. Scrape sides and bottom of bowl in between adding each egg. Mixture will get lighter in color with each egg.   DO NOT USE PADDLE ATTACHMENT FOR THIS STEP OR YOUR PIE WILL NOT TURN OUT.  

 Mixture may be a little grainy.  That’s how the pie was. 

 Fill pie crust and refrigerate.   The filling will set up in a couple of hours.

 Whip heavy cream and add a little sugar to it.  Spread on top.  Enjoy!!!

Notes:

Unsweetened chocolate usually comes in a 4 oz bar.  If those bars are made up of (8)  1/2 ounce sections, I use 2.5 ounces, or 5 sections. 

 Recipe tastes best with a savory pie crust, but I have used a gluten free oreo type crust also.


Original recipe from recipe card made 7 pies.

2 lb of butter or 32 oz 

1 lb of unsweetened solid baking chocolate or 16 oz 

3 lb of granulated white sugar or 48 oz 

20 eggs or approximately 42.5 Oz


Converted into ounces and divided by 7 for one pie.

32 oz of butter divided by 7 equals 4.57 oz

16 oz of unsweetened solid baking chocolate divided by 7 equals 2.28 oz

48 oz of granulated sugar divided by 7 equals 6.85 oz

20 eggs divided by 7 equals  6.1 oz


Saturday, February 17, 2018

Fantasy Fudge Fix

I've been testing a couple of popular fudge recipes.  One is super easy and uses sweetened condensed milk and chocolate chips and that's about it. The other is called Fantasy Fudge. In addition to using chocolate chips it uses cane sugar, evaporated milk,  marshmallow cream,  lots of butter, and you have to boil it. Not as easy. Both have probably been around for decades .  After taste testing both,  most of my taste testers like the boiled fudge better. I don't know how to describe it exactly, but it just has a  more complex  and in-depth flavor.  Maybe caramel undertones from the boiled butter, sugar, milk mix add to its deliciousness.  If you are in a hurry and you want something super simple,  I would go with the chocolate chips added to the sweetened condensed milk recipes out there.  ***This post is not one of those recipes.***

Fantasy Fudge has been made for decades. I'm new to the fudge making world. That being said, I'm not new to the tweaking or doctoring almost-every-recipe-I-try world. The original FF recipe calls for 3 cups of sugar and semi-sweet chocolate chips in addition to everything else. I believe almost every recipe online has too much sugar. Especially recipes from the 1960s and 70s and earlier. So after  changing the amount of sugar multiple times, adding salt, not adding salt,  adding more butter, and adding less butter, here is my final version which I call Fantasy Fudge, Fixed.  Everyone I have given it to loves it. I see them going back for more so I know they're  not just trying to spare my delicate feelings. No one can believe I cut out 3/4 of a cup of sugar from the original recipe and used dark chocolate chips instead because it is still sweet fudge. In my version of this old recipe you can actually taste the chocolate!!!   Try it and you will be a believer.  So says the Fudge Doctor!!

Ingredients:
2 1/4 cups granulated sugar
1.5 sticks (12 T or 3/4 cup) of salted butter.
5 oz of evaporated milk. Not sweetened condensed.
12 oz dark chocolate chips (About 2 measuring cups full.) I use Ghirardelli 60% cocoa chips and then need to open up a second bag because their bags only have 10 oz.
7 oz jar of marshmallow cream or the equivalent in mini marshmallows.
1/2 to 1 teaspoon flavored extracts if you want to flavor it. I would start with 1/2 t and taste test for strength.
I have used peppermint and orange.

Do a heads:
To make it easy and so you don't have to run around at the last minute, follow these preliminary steps.
Have a 9 or 8 inch baking pan lined with nonstick foil ready-remember the non-stick side is the dull side.
Open up your jar of marshmallow cream and empty it into a large-sized mixing bowl.
Measure out your chocolate chips into a separate bowl and set them near your stovetop.
Before adding anything to the saucepan, butter the sides and all the way up to the top of a medium-sized saucepan to help prevent sugar crystals from forming when boiling the milk butter sugar mixture.
Have a candy thermometer ready. Or be prepared to guess at the boiling time of between 5 and 7 minutes. It needs to be soft ball stage.
Have your mixer ready or be prepared to beat the fudge by hand with a heavy big spoon for at least a minute. The fudge will be thick so prepare to use muscles.

Directions:
1. In a medium sized saucepan melt the butter, granulated sugar, and milk together over medium low heat while slowly stirring. Once the sugar and butter are completely melted increase heat to medium. You don't want to bring it up to a rapid boil too fast or it will burn.

2.  Being careful NOT to scrape the sides of the pan, stir the mixture until it begins a rapid boil. Once it begins a rapid boil, constantly continue to stir carefully, making sure not to scrape the sides, for about 5 to 6 minutes. It always takes me closer to 6 and 1/2 minutes, but I use my candy thermometer to get the temperature up to 234 degrees.

3.  Once the correct consistency or temp of 234 of the boiled mixture has been reached, remove it from the heat and stir the chocolate chips into the mixture in the saucepan trying NOT to scrape the sides of the pan. Stir quickly because you want the mixture to remain hot (in order to melt the marshmallow cream later). It should look thick and grainy.

4.Once the chips are fully incorporated, quickly with a spatula and remembering NOT to scrape the sides of the pot , scrape the chocolate out of the pot into the bowl with marshmallow cream. Give it a quick stir from the bottom up so you can get the marshmallow cream up from the bottom.  Add any extracts now.  Then beat with a mixer for about 1 minute or until it doesn't look too shiny anymore.  I use my hand held mixer.

5.  Quickly pour or use your spatula to get the thickened chocolate fudge mixture out of the bowl and into your non-stick foil lined pan. Use a frosting spatuala or some other utensil to spread it out and flatten it out.

Notes:
I usually let mine set up in a cool room and it takes about 2 hours. You can quicken that setting-up time by covering the fudge and putting it into the refrigerator.
When cutting the fudge, make sure to check that the foil doesn't stick to the bottom of the fudge pieces. Sometimes mine does and I have to peel the foil away.  It peels away easily.

Saturday, October 8, 2016

Easy Squash Soup

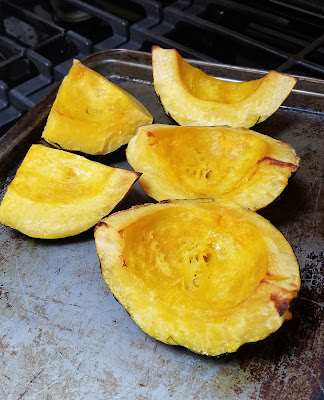
I planted 6 squash plants this year.  3 acorn and 3 butternut. I forgot how large their leaves get and how much space they take up.  I even had a sqaush vine and squash hanging high up in my Cotoneaster hedge.  It was my most perfect shaped squash.  
I like easy.  I came up with this recipe by using Alton Brown's basic recipe. With my changes this is the best squash soup I've ever tasted.  I don't usually mess with Alton, but this time his soup was laking something for me.  
You judge for yourselves!!  You can make it savory or sweet.  Just omit the sugar.  
I used spenda to replace the sugar so my diabetic mom could try it.  You can't tell it has a sugar sub.  
My changes to Alton's recipe were to use half and half instead of cream, (milk plus cream) less salt, no nutmeg, powdered ginger instead of fresh, a whole small onion, a tiny bit of ground cloves, and cinnamon.  You could make this dairy free by using coconut milk.  
I used acorn squash for this first batch.  Their flesh is a bit less orange than the butternut. 


Squash soup in Starbuck's Pumpkin mug

Recipe: 
Alton Brown's original recipe for  squash soup with my changes in CAPS below.         

Ingredients

3 to 3 1/2 pounds butternut squash, approximately 2, seeded and quartered (I used 2 large acorn squash)
1 SMALL ONION CUT UP
OIL Unsalted butter, melted, for brushing
SALT FOR SPRINKLING 1 tablespoon kosher salt, plus 1 teaspoon
1 teaspoon freshly ground white pepper, plus 1/2 teaspoon
3 cups chicken or vegetable broth
1/4 cup honey OR ¼ CUP SPLENDA
1 teaspoon minced fresh ginger OR ¼ TEASPOON POWDERED
1 TEASPOON GROUND CINNAMON
1/8 TEASPOON GROUND CLOVES-tread lightly this is strong. 
1/2 cup heavy cream  HALF AND HALF OR WHOLE MILK
1/4 teaspoon freshly grated nutmeg


Directions

Heat the oven to 400 degrees F.
Place the quartered squash onto a cookie sheet with rims, brush the flesh of the squash with OIL AND SPRINKLE GENEROUSLY WITH SALT. a little butter and season with 1 tablespoon of the salt and 1 teaspoon of the white pepper. Place in the oven and roast for 30 to 35 minutes or until the flesh is soft and tender-poke with a fork to see if it is soft.  WHILE SQUASH ROASTS COOK THE ONION IN A SMALL PAN WITH A LITTLE OIL UNTIL IT IS TRANSLUCENT BUT NOT CRISPY.  SET ASIDE.
Scoop OR PEEL with a vegetable peeler the flesh out of the SQUASH skin and place into a 6-quart pot. Add the  COOKED ONION, broth, honey and ginger. Place over medium heat and bring to a simmer, approximately 7 to 8 minutes. Using a stick blender, puree the mixture until smooth*. Stir in the HALF AND HALF heavy cream and return to a low simmer. Season with the remaining CINNAMON, CLOVES, 1 teaspoon salt, pepper, and nutmeg.
*When blending hot liquids: Remove liquid from the heat and allow to cool for at least 5 minutes. Transfer liquid to a blender or food processor and fill it no more than halfway. If using a blender, release one corner of the lid. This prevents the vacuum effect that creates heat explosions. Place a towel over the top of the machine, pulse a few times then process on high speed until smooth.
Original  recipe courtesy of Alton Brown, 2003.  Changes made by me 2016.


Tuesday, February 16, 2016

KEY LIME PIE-LOOK MOM, NO EGGS!!

Well, almost 2 years has gone by since my last post.  I can't believe that much time has passed.  Dealing with other's health issues and my ebay store distracted me from baking blogging.  I also had not been to my Winter escape in Florida for 2 years.  Well, I was lucky enough to go this year.  I just returned from the Fort Myers area with a key lime pie agenda because after sampling probably half a dozen different key lime pies, I was not impressed with any of them.  


It was disappointing. Some too sweet, some too tart, some too cheese-cakey, some too sour creamy, some soggy crusts, crumbly crusts, etc. One slice was served at a fine restaurant and the key lime filling was grainy!!!  I called the server over to tell her.  She got the owner.  The owner said it is a frozen pie they thaw and they are well known for it-grainy texture and all.  I was shocked and so was my aunt. It felt like eating sand-not that I know what that's like, but I can guess now!!.  Neither one of us could take more than one bite.  

Usually my quest for a good popular pie takes more than one try because there are hundreds of recipes for it.  Not this time!!  I lurk on the Cookie Madness blog often because Anna has great recipes and many of them.  The first recipe I tried and altered just a little bit was perfect for me!!!   Tart, sweet, silky smooth, and with a crispy crust that contrasts deliciously in your mouth with the smooth pie.  Oh, and did I mention NO EGGS??? And did I mention lower cholesterol due to NO EGGS and use of YOGURT instead of sour cream???   I don't know why anyone would use eggs anymore when you can make a fantastic pie with out them.  And only 4 ingredients in the filling!  The original recipe I altered is found here on Cookie Madness    If you try my rendition of this recipe (or Cookie Madness' recipe), I'm confident you will not be disappointed.  What's especially nice is since there are no eggs, once you fully mix mix the filling ingredients together, you can taste it to see if it is tart enough for you before you make the commitment of pouring it into the pie shell.   
Just to whet your appetite

Smooth as silk inside


You will need the following ingredients.  I forgot to include butter and the larger lime in the first photograph.  You can use either graham cracker crumbs or cookie crumbs for the crust. Both options are pictured here.


I use a microplane for zesting the limes.  The lime I zested was a larger persian lime which is the standard lime available in grocery stores. 


My pie plate was too large.  It was a 10 inch.  A 9 inch would yield a little thicker filling, but still not high.  You can fix that by doubling the filling recipe below


Here is the recipe:

Preheat oven to 350

Use a 9 or 10 inch pie plate (10 inch will be thin like mine) 

INGREDIENTS:

Crust:
18 Oreo Toasted Coconut sandwich cookies  (or an Oreo flavor of your choice)
4 Tablespoons SALTED butter - melted. (salted is a must as the cookies are sweeeeet) 
1/8 teaspoon salt or just a pinch

Filling: (May be doubled for a thicker, taller pie)
1 can (14 oz) sweetened condensed milk 
1/4 generous cup of full fat plain unsweetened yogurt
7 Tablespoons fresh squeezed lime juice  (1 large lime yielded 4 Tablespoons of juice for me and then I added 3 Tablespoons from about 6 or 7 key limes I juiced)  Or you can use bottled juices.
1/2 Tablespoon of lime zest or more for zestier pie. (1 large lime yielded about 1 Tablespoon zest.) 

Topping: 
Redi Whip or make your own whipped cream topping 
Left over lime zest for sprinkling on whipped cream

DIRECTIONS:

**Crust
Process the whole cookies in a food processor until they are small crumbs (or put them into a zip lock baggie and smash them by hand or with a rolling pin).  Pour into a medium sized bowl and mix in salt.  Then mix in melted butter.  
Press cookie mixture into the pie plate (I use the bottom of the one cup measuring cup or a small rounded bowl to press the mixture into the pan.)  
Bake for about 6-7 minutes.  

**Filling
While the crust is baking and In a medium bowl add in the sweetened condensed milk, yogurt, zest, and lime juice.  Mix well to make sure yogurt is blended in-make sure you mix from the bottom of the bowl where yogurt hides sometimes!  
Pour into the baked pie crust and bake another 6 or 7 minutes.  You can tell it is done by taking the pie out and gently shaking it-it should not be too jiggly. I also saw some bubbles forming on the top so I knew it was time to take out.  Mine was set at 7 minutes.  DO NOT WAIT UNTIL THE FILLING BROWNS!!!

Cool for about an hour at room temperature or until the pie is no longer warm.  If you don't want condensation drops to form on the plastic covering the pie (they can drip onto the pie and discolor it), after cooling for an hour on the counter put the pie uncovered in the refrigerator for about 30 minutes. Then cover tightly and refrigerate for at least 4 hours.  

If you use a canned whipped topping, don't put it on the whole pie, but just on each piece served.  That type of whipped topping melts after a while so it won't survive in the refrigerator overnight.  I learned that the hard way.  

Please let me know if you try this recipe!!


Notes: 
1.  I used a glass pie plate and my cookie crust did not stick to it. If you use metal or something else you might want to lightly butter or oil the pie plate so the slices come out easily. 


Saturday, April 5, 2014

Best Mint Ice Cream!

Haven't been in the posting mood for um.. a while!  Just had another snow storm and got 7 inches of fresh, heavy snow.  Ice cream makes me think of Summer and I need a Summer fix for sure.  I just made my SECOND batch of Cookie Madness Mint Chocolate Chip ice cream.  I also completed my back-up plan:  I  found another never used, packaging- peanut- remnants- still- clinging- to- the- bowl Cuisinart ice cream maker at my local New Uses store.  To my dismay the price nearly doubled since the last $17 machine I bought.  I guess they did their home work. New ice cream makers are expensive.   Still, $32 for a never used $60 machine is a steal.
If you like mild mint flavored ice cream that does not have a dozen egg yolks in it, this recipe is for you.

Creamy, minty, chocolatey

My quality control tester Margo-I ran out of mixing room  so had to use the bathroom.
That's Margo's domain because it has the sink she thinks is her private watering hole. 


Here is Anna's recipe with a couple ingredient changes I made:
( I leave out the vanilla and add salt)

Utensils you will need:

Medium sized heat-proof bowl
large mixing bowl
Mesh strainer
fine mesh strainer to set over large mixing bowl
medium sauce pan
kitchen towel
heat proof spatula or wooden spoon
whisk
electric ice cream maker

Ingredients
  • 3/4 cup granulated sugar
  • 1 tablespoon cornstarch
  • 1/8 heaping teaspoon salt
  • 2 large eggs (whites and yolks)
  • 1 cup whole milk or half and half or Fat Free half and half  (I've used both regular and Fat Free half and half.  Ice cream came out good both ways)
  • 2 cups heavy cream (divided use)
  • 1 3/4 teaspoons peppermint extract (not mint — make sure it says peppermint)
  • 3 oz  mini chocolate chips, finely grated chocolate, or make your own (**I did this-see below)
  • Optional:  Green food coloring  and Oreo or another chocolate pie crust
Instructions: 
  1. Put an empty container into the freezer to be ready for filling with your ice cream.  
  2.  In a medium size bowl mix eggs with cornstarch , sugar, and salt.   Set near stove.  (Tip: put the bowl on a kitchen towel so it will stay still while you are mixing in the custard below)
  3. Pour 1 cup of cream into a large bowl.  Set a strainer over the top.
  4.  In a heavy saucepan set over medium heat, bring the 1 cup of milk and 1 cup of the cream to a simmer. 
  5. Whisking constantly, slowly pour the simmering cream mixture into the egg mixture. Return the mixture to the saucepan.  Reduce heat to about medium low and stir slowly, but constantly MIXING UP FROM THE BOTTOM until the mixture thickens – it should NOT come to a complete boil.  It should appear like thick gravy.  Cook to about 170 degrees
  6. Remove from heat and pour through the mesh strainer into the bowl of cream.  Slowly mix. 
  7. Mix in peppermint extract  and add 2 drops of green food coloring if desired.
  8. Transfer to a shallow bowl and allow to cool on the counter for 1/2 hour or so.  Then cover and cool over night or at least 4 hours in the refrigerator.  
  9. Mix according to your ice cream maker's instructions.
  10. Pour into the empty frozen container OR pour into a frozen Oreo pie crust and freeze for at least 4 hours.  
**  Per Anna's instructions I used 3 oz of dark chocolate (I used Trader Joe's)  melted in the microwave and then added 2 teaspoons of canola oil to smooth it out.   I spread it on a parchment lined cookie sheet until it was thin and refrigerated it for 1/2 hour.   Then cut or break up into small pieces and mix into ice cream during the last few minutes of churning.  Or mix in by hand after churning.   

Notes:  Leave out the mint, add a tablespoon of vanilla, and you will have delicious vanilla ice cream.  

Monday, October 7, 2013

KAF Flourless Fudge Cookies

OMG.  Who knew gluten-free deep, dark chocolate cookies could be quick and easy to make.  If you want a perfect dark chocolate, gluten-free, easy cookie to mix up, look no further. Most people don't have a clue there is no flour in this recipe. Just look at the photo below. They taste as good as they look!


These are so easy to make your five-year old could do it!
Here is my adaptation of King Arthur Flour's Flourless Fudge Cookie

Yeild:  about 24 cookies

Ingredients:

  • 2 cups confectioners' sugar (powdered sugar)
  • 1/4 teaspoon salt
  • 1/2 teaspoon decaf coffee crystals (smashed fine with a spoon), optional but good
  • **1 cup cocoa powder, Dutch-process (or make your own) 
  • 3 large egg whites ( or 4 if your batter is stiff)
  • 1/2 teaspoon gluten-free extract (I would use orange, but you could use almond,  vanilla, or whatever you like)
  • 1 cup semi sweet chocolate chips
  • 1 cup toasted nuts

Directions:
  1. Have egg whites at room temperature
  2. Preheat oven to 350°.  Spray two large cookie sheets with nonstick spray or line with parchment paper and spray that with nonstick spray **(Make sure it is not the baking spray because that has flour in it).
  3. In a medium-size bowl combine dry ingredients with a wire whisk until mixed well. Set-aside.
  4. In a small bowl using a fork lightly beat the egg whites for about 10 seconds.  Mix in extracts.
  5. Pour the egg whites into the dry ingredients  and mix carefully until fully combined using a spatula to mix up from the bottom.  (Batter is supposed to be thin like cake batter, but mine never is).  Then mix in chocolate chips and toasted nuts.
  6. Drop by tablespoon full onto cookie sheets leaving at least 1 inch space between cookies ( if you don't add chocolate chips or nuts they will spread more so give them at least 2 inches space.)
  7. Bake for eight or nine minutes. Remove from oven and either let cool on the tray or wait a few minutes and then pick them up and put them on cookie cooling racks. 
  8. Store covered on your counter.  Not sure how long they last, but it has not been an issue here.    
**Notes:  
I used a suggestion I read on the Internet on how to turn natural processed cocoa like Hershey's into Dutch processed cocoa.  Dutch processed cocoa has less acid and is more expensive.   For every 3 tablespoons of Hershey's natural cocoa you mix in 1/8 of a teaspoon of baking soda which is an alkaline. So for a cup of Hershey's natural cocoa (16 tablespoons) you mix in approximately 5/8 of a teaspoon. I think I may try using the Dutch cocoa next time, but these came out good. I just want to see if there is a difference.

Sunday, October 6, 2013

Delicious Gluten-Free Orange Chocolate Chip Meringue Cookies AKA Forgotten Kisses

I have been looking for gluten-free cookies recipes and recently came upon a post from Anna at Cookie Madness for meringue cookies.  Her recipe opened up a whole new world of meringue cookies for me.  Forgotten Kisses refers to leaving the cookies in the oven from a few hours to overnight to crisp up.  I altered Anna's recipe a bit, but as is they were great too!!!  
I am an orange and chocolate fan so I added some orange extract to the whipped egg whites. 
You can find her recipe at the link above.
Gluten free, less fat, and some egg-white protein too!  What's not to like?


Chocolate-chip pecan meringue cookies

My adapted recipe is here:

Ingredients
  • 3 large egg whites
  • 1 cup sifted confectioners’ sugar (don't skimp)
  • 1/4 teaspoon cream of tartar 
  • 1/2 teaspoon orange extract
  • 1 cup pecans or walnuts, toasted and chopped
  • 3/4 cup semi-sweet chocolate chips.
Instructions
  1. Preheat oven to 275 degrees. Line two baking sheets with parchment paper.  ( I made the cookies big and only needed one sheet. See tips below.) 
  2. In a mixing bowl, beat the egg whites with an electric mixer until just foamy.  Add cream of tartar.  Continue beating until you have soft peaks.  Beat in the sugar a few tablespoons at a time. Continue beating until stiff, shiny peaks form (mine didn't get completely stiff. It looked like stiffer shiny marshmallow cream). 
  3. To make sure the sugar has disolved, take a bit of the whites and rub between your fingers.  If it is silky smooth, you should be close to done. Then beat in the extract. Carefully fold in the pecans and chocolate chips.
  4. Using a teaspoon, drop 12 mounds of cookie dough onto each baking sheet. Set one sheet on the middle rack and one on the lower rack and bake for 15 minutes.
  5. After 15 minutes switch the baking sheets so the sheet on the bottom is now on the top and the sheet on top is not on the bottom. Bake for another 15 minutes at 275 degrees.
  6. Turn off oven and let the cookies sit in the closed oven for about two hours or overnight. 


Tips:  
  1. Use egg whites that are at least as warm as room temperature.  I take mine out and put them on top of the oven while it is preheating.
  2. My stand mixer would not beat this small amount of whites so I needed to use my hand mixer.  
  3. Make sure you use at least a medium sized bowl because the whites will increase in volume as you beat them.
  4. Take a dab of the whipped egg whites and put some under each corner of the parchment paper to work as "glue" so it doesn't slip.
  5. Bigger cookies are a bit crumbly, but I think they are impressive-looking.  Smaller "one bite" sized cookies are neater.  
  6. I made larger cookies and got 13.  I baked them 45 minutes at 275 degrees.  
  7. You can try using mini chocolate chips if you make smaller cookies.
  8. Don't make them on a humid day unless you've got the AC running. 
  9. Don't eat too many.  They are suprisingly good!!